Order when lowering the cylinder head
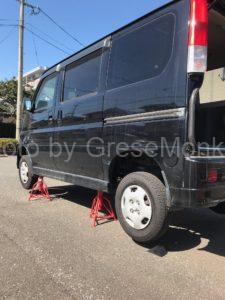
I am going to lower the cylinder head to replace the cylinder head gasket, which is the cause of overheating, but the order in my case is as follows.
- Disassembly of exhaust system (exhaust manifold)
- Disassembly of intake system · electrical system (inlet manifold)
- Tappet cover removal
- Disassembly of timing belt and water pump
- Lower the cylinder head
Disassembly of exhaust system (exhaust manifold)
The exhaust system is rusty with bolts and nuts, it may not be loose, or it may break at the worst. So, if it is impossible to remove it by all means, there is also a method to lower the head with the exhaust manifold and catalyst installed as it is. However, after overhauling the head, if you overhaul the rocker shaft, valves, etc., it seems to be pretty disturbing.
I think it would be better if I could remove all as much as possible, but in the case of replacing only the head gasket, for example due to the cost etc, remove the muffler only after the catalyst can shorten the operation time I think so.
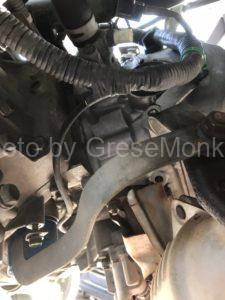
Remove thermostat and housing
When extracting LLC (cooling water), there is a drain bolt (12 mm) in the housing of this thermostat, so remove LLC therefrom. The position of the thermostat is located next to the water pump on the timing belt cover side. I think that it is easy to understand because two water hoses are connected.
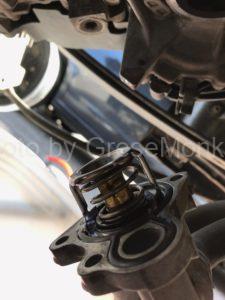
The thermostat packing is attached to the thermo body beforehand.
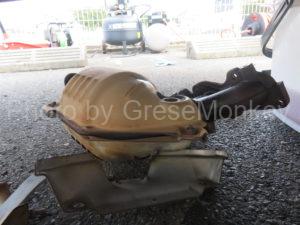
Remove the catalyst body and muffler pipe
Disconnect the catalyst body and muffler pipe connection. At this time, two bolts with springs are removed, but I think that it is better not to use the impact wrench as much as possible to prevent bolt breaking. We recommend that you blow slow penetration lubricant such as CRC to the thread part slowly and loosen alternately.
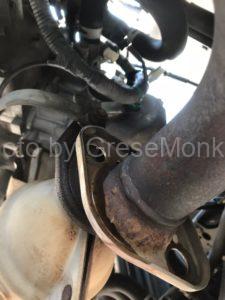
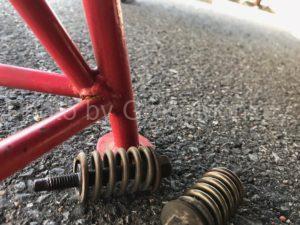
Also, since the positions of the catalyst and the muffler pipe are determined and the arms for preventing the buffer harness from being forgotten easily at the time of assembly, it is preferable to take a photograph and record it and remember it think.
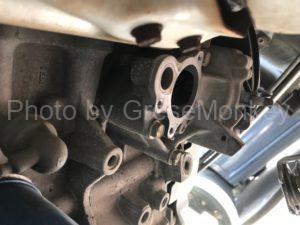
Remove the heat shield plate and remove the exhaust manifold
There are two heat shield plates surrounding the exhaust manifold. You should loosen both bolts of 10 mm each at a time, but it may be very fragile, the screw head may be licked and tightened and the wrench may not hang. Although it is not high torque, it is not high torque, but if you do not loose normally, there are ways to relax with power skill with vise pliers or pliers, but in the worst case it is even better to screw up and drill later There is also a method to fix by tapping. So do not give up because you do not loose. The important thing is to have many options to recover in any case.
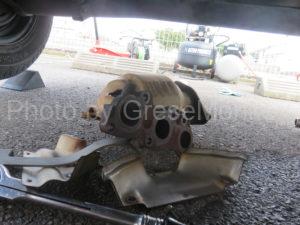
Do not forget to remove the O2 sensor attached to the catalyst.
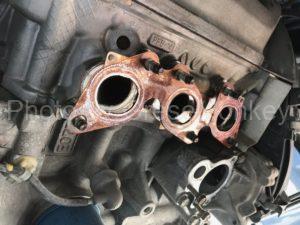
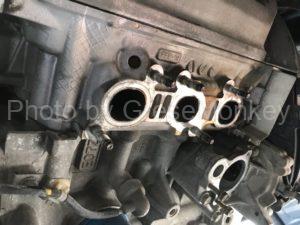
Since the gasket of the exhaust manifold is made of metal, it is not stuck to the head and it can be removed easily.
The above is the removal of the exhaust manifold / muffler when lowering the head, but the point to be aware of here is that it seems that it is a way of handling bolts and nuts which are still sticking and sticking, rusting and becoming less loose I will. On my own experience, I think that maintenance of the exhaust system will depend on the usage situation of the car. For example, bolts and nuts used in the exhaust system of vehicles left for a long period of time do not travel much more than cars which are used on a daily basis and the exhaust system is always exposed to heat, and pain It is easy to loosen, it is easy for trouble in maintenance work to occur.
Knowing the use situation of the car before it goes to maintenance can predict troubles that can be assumed from it, roughly plan a maintenance work according to it, expect smooth operation Is not it possible to do?
