Honda · Vamos timing belt exchange
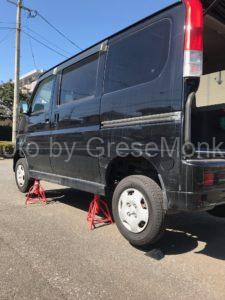
It is a timing belt exchange of Honda · Vamos (Heisei era 2005 model: ABA-HM 1 engine model: E 07 Z). The procedure is as follows.
- Unplug engine cooling water (LLC)
- Remove the tappet cover
- Remove the engine mount / timing belt cover
- Remove the timing belt
- Exchange water pump
- Timing belt installation and belt tension adjustment
- engine start
- Bleeding of cooling water
- Commissioning
Unplug engine cooling water (LLC)
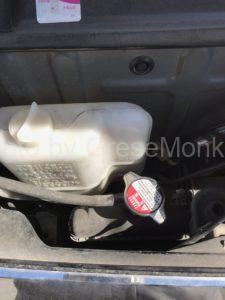
Lift up the car and remove the cooling water. There is a drain bolt in the drain cock below the radiator and the thermostat housing on the engine side, so loosen both of them. If it is only from the radiator, the cooling water will not come off cleanly. Then, when exchanging as a regular exchange at a mileage of 100,000 kilometers etc., we also recommend exchanging the thermostat at the same time.
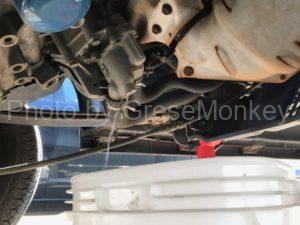
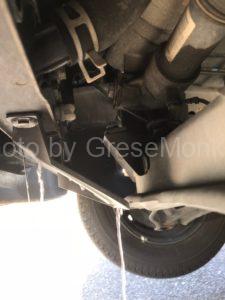
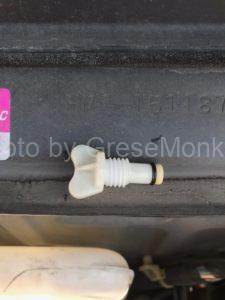
Although it can not be confirmed with the photograph, there is a 12 mm drain bolt on the outside of the housing where the thermostat is set. Copper packing of drain bolt is exchange as a rule.
Remove the tappet cover and remove the engine mount
In the case of the Vamos engine, remove the tappet cover before removing the timing belt cover so that the timing belt cover will not come off. Packing, plug seal, seal washer etc attached to this tappet cover will be replaced when replacing.
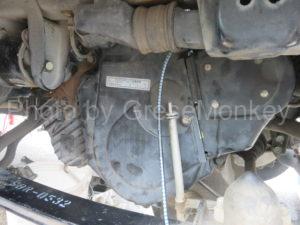
It is easier to work if you remove the engine oil level gauge in front of the photo
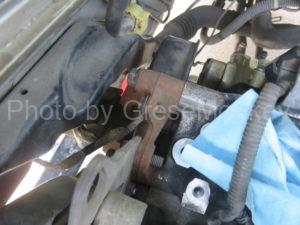
The brown part is the engine mount bracket
Work can not be done unless the engine mount and bracket are removed. In the case of myself, with the car body lifted up, we removed the mount and the bracket with the engine and the oil pan part on the in-vehicle jack supporting the engine alone. Also, since this TDC sensor is attached to this bracket, remove the bolts by loosening the bolts carefully so as not to damage the sensor. The engine mount on the side of the timing belt is removed and it is in a state where one side of the engine main body is supported by a jack, but this makes it easier to work because the engine body can be raised and lowered to some extent by the jack. However, since the car body is lifted up to the last, I will try to be particularly careful in safety.
Remove the timing belt
First, remove the alternator belt and air conditioner belt. Next, loosen the crankshaft pulley bolt. This time we loosen it with a special tool and spinner handle like the photo, but this bolt is tightened very tightly and will not loosen easily easily. I think that I will use the impact wrench easily because it will not loose, but that is OK. However, if it still does not get loose, you will loose it manually. The way to relax the high torque is to make your own efforts and to use only the good tools. By the way, although the engine rotates counterclockwise, the crank pulley bolt is a right screw.
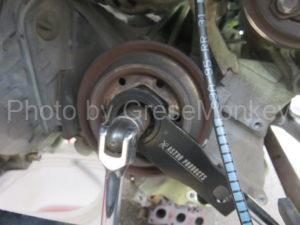
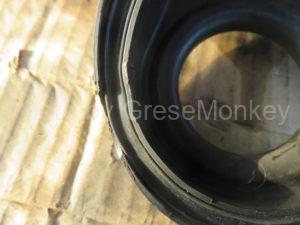
Loosen the crank pulley and check the state of the belt and the crankshaft by rotating the crankshaft to see if the matching marks are in place as you face the timing belt. In this work, since the outside of the timing belt was scraped, ascertaining the cause, the part near the crankshaft and sprocket of the timing belt cover was slightly dented inward. It seems that the timing belt was interfering with this part. I was scared in reverse because I was driving normally in this state, scratches scraped off by the tensioner that the timing belt is stored and scraped to the front cover part. Since I had never serviced the timing belt since I got this car, I am lucky saved by this maintenance work.
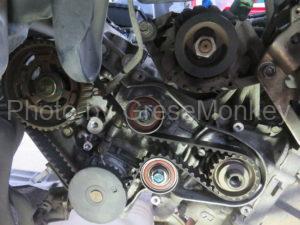
Match the matching mark and remove it
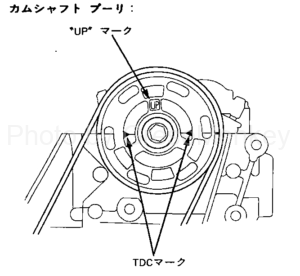
While borrowing the crankshaft pulley and turning the crankshaft shaft counterclockwise, align the matching mark of the crankshaft and sprocket with the matching mark of the camshaft and sprocket, bring the first cylinder of the engine to the compression top dead center position Suit you. From this position, turn the crank further 2 to the left and if the match mark of the crank matches, it is OK if the match mark of the camshaft · sprocket matches.
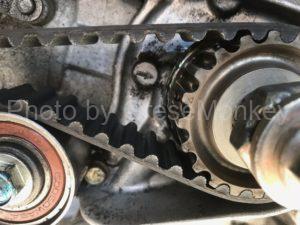
Crank side matching mark
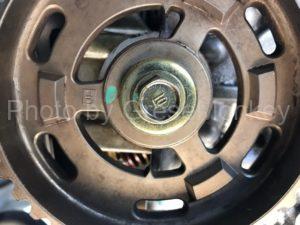
Camshaft mate mark
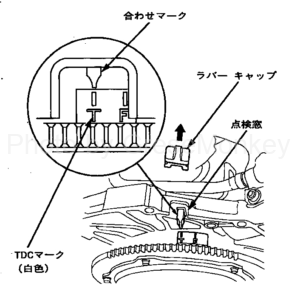
In the engine room. It is a confirmation method of crankshaft mate mark.
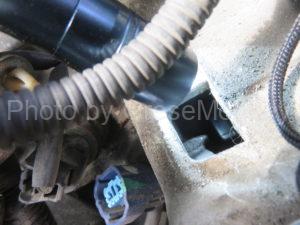
The position of the inspection window is the connection between the engine body and the transmission. You can check near the position where the engine number is engraved.
Instead of tightening rent a crank shaft pulley, caliber will there is a way to tighten to borrow bite between the large nut crank pulley bolt, but the work is the person who is easy to do to much. However, please never stop tightening only crank pulley bolts directly. Even if it says temporary tightening, since the engine is rotated counterclockwise, it means that it does not have any meaning as it will eventually become loose, and even if it is not this engine, directly attaching the crank pulley bolt is right The more you rotate it will tighten the threaded portion of the crankshaft, which in the worst case will damage the screw with a high probability. Therefore, when attaching bolts, be sure to hang nuts (whatever is possible) larger than the threaded part diameter of the crankshaft in the middle and borrow and tighten to such an extent that it will not loosen even if it is rotated left and right.
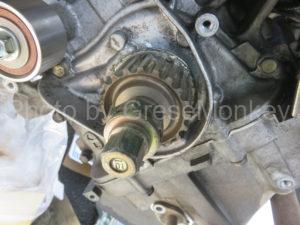
Loosen the fixing bolt of the tensioner, push up the tensioner body upward, and remove the timing belt.
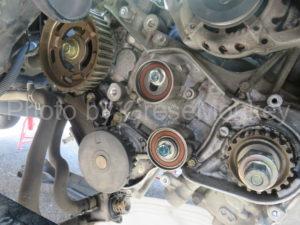
Change water pump
The water pump is fastened at 4 places with 10 mm bolts. Packing is also attached to the new item. After checking that the shapes are the same, make sure to grind the waterproof surface of the water pump with the oil stone before replacing the packing, then install the packing as it is.
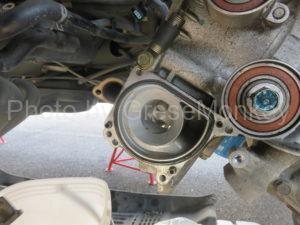
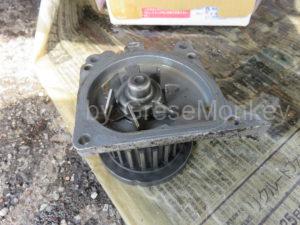
Timing belt installation and tension adjustment
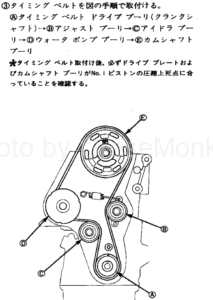
Timing belt tensioner · idler · camshaft After replacing the oil seal and crank oil seal, check again whether the cam and crank marking mark is in the correct position, and attach the belt. The installation procedure is as follows.
On the tight side and the loose side of the belt
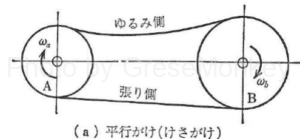
For example, in the above figure, pulley A is the drive pulley (turning side) pulley B is the driven pulley (turning side) In the above figure, when the belt is rotating, the loose side of the belt Is the positional relation as shown in the above figure. What I want to say is that when applying proper tension (tension) to the belt, the person hanging on this loose side can maximize the transmission efficiency of the belt. So, the position of the timing belt tensioner this time is also set on this loose side.
Timing adjustment of the Vamos timing belt is carried out by first setting the timing belt with the matching mark aligned, then loosening the tensioner bolt once to operate and then borrowing it and then turning the timing belt in the direction of rotation of the engine Rotate) to the position of the cam mark of the camshaft · sprocket with the number of frames of the timing belt advanced to the position advanced by 5 frames, and then loosen the tensioner bolt again in that state, it is stated in the maintenance manual. Activating the tensioner body at this time should move the belt a little more than before rotation. In other words, when you move forward five frames, the loose side of the belt is in the state that it is the most loose.
I think that it is understood if the person who removed the cylinder head thinks that the position of the camshaft · sprocket is advanced by 5 pieces in the direction of rotation but the position of the camshaft is not operating all the valves of the engine (All valves are closed), which means that the power load on the camshaft and sprocket is minimal at this time. Naturally the belt loosens at this time, so at this point the tensioner is maximized, giving the timing belt the proper tension.
By applying the appropriate tension, the power transmission of the crank and the cam is made most appropriate, and by preventing the looseness, the frame scattering of the belt is prevented. The reason that the timing belt of a general automobile is exchanged for about 100,000 km is that the tensioner becomes ineffective as a result of the belt stretching due to deterioration and it is highly probable that coma flying will occur. It is considered to be
Tension adjustment of timing belt
Based on the preceding thing, if you refer to the timing belt tension adjustment shown below, you will be satisfied. (Quoted from the maintenance document below)
With the above adjustment of the tension of the timing belt, when the crank rotates two turns from the matching mark, it means that it is smoothly rotated (no valve interference) while feeling compression, without any jamming, and the cam sprocket and crank It is OK if the fit mark of the shaft · sprocket is correctly matched. After that, make sure that each bolt is properly tightened or whether each part is installed in the proper position and assemble it as originally.
Attachment of crank pulley

Tighten the crank pulley with proper torque. Please use torque wrench without using impact wrench.
Start the engine and start bleeding
If you can do so far, build up everything as it is, check the engine oil and cooling water, and start the engine. In case of carrying out large-scale maintenance such as engine OH or when restarting the engine when leaving the car for a long time, crank it with the engine ECU fuse of the fuse box removed. Then the fuel is cut, the crank rotates and the oil pump operates with the sparks not flying. Please crank this until the OIL lamp in the driver ‘s seat meter disappears.
When the OIL lamp turns off, set the ECU fuse again and start the engine. If the engine rotates with a smooth sound, it is successful if it is properly blown up. As it is, bleed air of cooling water enters.
to be continued.
[:]
