Formula 2009 year: Honda fit model: GE6 engine model: L13A mileage: 181, 500 km
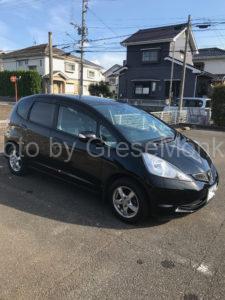
Honda Fit’s car inspection and maintenance
It is a car inspection and maintenance of my car. Jacking up and checking in advance, I could hardly see where the mileage was mostly damaged, for a mileage of 180,000 kilos. Since there was no particular problem in the downside and the appearance, I thought whether I should bring in the inspection without carrying anything as it is, but I decided to replace expendable parts considering the number of mileage, and to do a car inspection indefinitely.
The contents of the car inspection service (replacement parts etc.) are as follows.
- Engine oil change 3.5 l (Honda genuine 0 w – 20)
- Exchange of oil element
- Air element exchange
- Wiper rubber exchange
- Front disk pad exchange
- Brake oil exchange 1.0 ℓ
- Brake adjustment
- HMMF (Honda · Multimatic Fluid) exchange
- Replace the plug
Cost of parts will be available if you prepare about 12,000 yen ~ 14,000 yen for the above parts. (Online mail order price)
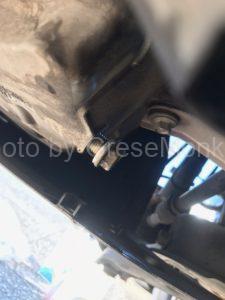
Points of jack-up
This time I jacked up at the parking lot of my house and worked. The point of the jack-up is the protruding portion of the center part of the engine frame at the rear of the rear of the engine, looking down from the belly of the car in the case of the front, the rear is the protruding part of the square metal (width about 15 cm) in the center part of the rear bumper I will. Basically, no matter which car you have, there is no picture, but basically when you look at the under belly of the vehicle from the center, if the front is part of the frame that supports the engine, the radiator etc, the rear part is the tow hook part , In FR cars there are often points in the hit of the differential gear. For details, please ask the nearest dealer or maintenance shop.
Also, although it is a part to hang a rigid rack (horse) after jacking up, in the case of fitting, there are parts reinforced slightly thick to hang the legs of the lift usually on the left and right front of the side sill, rear four places It was OK at that position this time. Depending on the car, it may be applied to parts other than side sills. I think that visiting a dealer or a maintenance factory is also the best.
Please work with maximum care for safety, such as equipment handling.
Engine oil change
In case of fitting, it is not always necessary to use genuine engine oil, but be sure to use engine oil with a viscosity of 0w – 20. Otherwise, the engine will malfunction and blow in the worst case. Please do not put engine oil of viscosity not specified even if it is wrong. Also, it is absolutely imperative to stop using engine oil with a viscosity of 0w – 20 even though there is no designation of 0W – 20. Always obey the viscosity specified by the manufacturer.
Do not forget to replace the drain bolt packing of the oil pan. We also sell it at home centers and so on. Also, when installing the oil element, be sure to apply engine oil to the seal of the contact surface and tighten it. The method of tightening is described in the element box, but in case it is not necessary to tighten it with a filter wrench after tightening with both hands until it is not tightened. After tightening, please check if it will not loosen easily with bare hands. Do not over tighten the oil element.
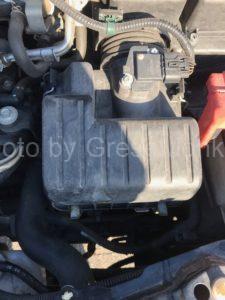
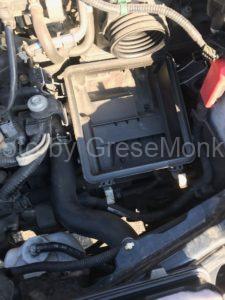
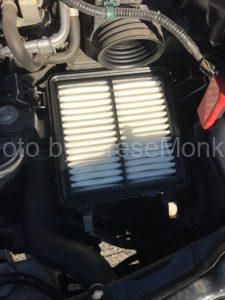
Air element exchange
Although replacing the air element is relatively simple, whether it fits neatly in the case when it is replaced with the orientation of the air element. Also, it is better to close the cover of the air cleaner case properly and make sure that the four hooks are properly stopped and set them to their original positions without fail.
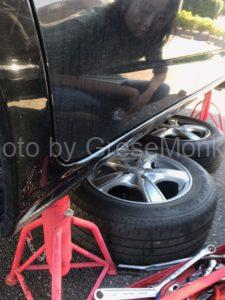
Procedure for replacing the front disk pad
First of all, loosen the bolts of the two bolts (12 mm) fixing the disc caliper and loosen the inner side and the lower side of the bolt (12 mm) to lift up the caliper itself.
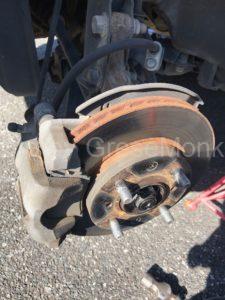
Next, check the condition of the disc pad. In the photograph, it was the thickness which required replacement with the remaining amount of 2 to 3 mm from the sensor attached to the pad.
Check the caliper piston boots to check for leakage of brake fluid and piston rust.
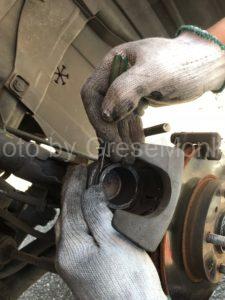
Use a larger water pump pliers to shrink the piston. At this time please leave the brake caliper on the other side as it is set.
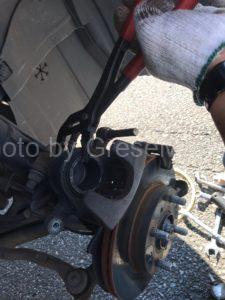
Install the old disk pad shim (thin plate) while greasing up on the new disk pad, set it as originally, cover the caliper and tighten the bolt to complete. In this case please install so that the brake hose etc is not twisted.
Brake oil change
After inspecting the rear drum brake, cleaning and adjusting the brake, drain the old brake fluid from the four breeders’ bleeders and replace with the new brake fluid. As a procedure, first with the brake master cylinder of the engine room filled with brake oil, you loosen the bleeder attached to each brake and stepping on the foot brake several times to discharge it to a dedicated bottle There is an order in the position of the brake to be drained. In principle, the closest part from the master cylinder of the engine room, namely the front (caliper) on the driver’s seat side → the front (caliper) on the passenger seat side → the rear (drum) on the driver’s seat side → the rear (drum) on the passenger seat side I will exchange the brake oil in order.
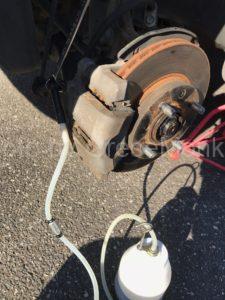
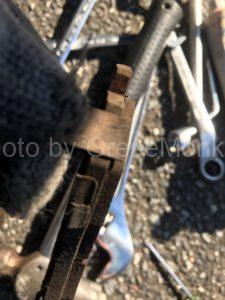
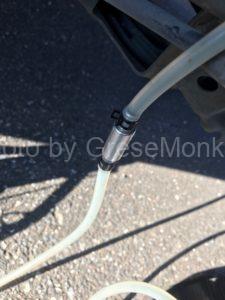
I set a special bottle on the brake breeder as shown in the photograph, I step on the driver’s seat pedal 6 to 7 times with the wrench loosen the bleeder plug, but at this time in the reserve tank of the master cylinder of the engine room Please pay attention to the amount of brake fluid. If the inside of this tank becomes empty, air will get caught in the brake oil and the brake will not work. If it should happen, you will have to do a few times to remove the air from the brake. If this happens, please work carefully while refilling frequently, consuming a large amount of brake fluid and meaningless replacement.
Bottles and hoses used for exchanging may be made by yourself, but please be sure to install a one way valve like a photo in the middle of the hose. With this, it is possible to prevent the exhausted brake fluid from flowing backward and mixing air into the brake piping. Also, when exchanging the brake fluid and bleeding work in the same way by one person, it is always recommended to use a dedicated breeder bottle with this one-way valve.
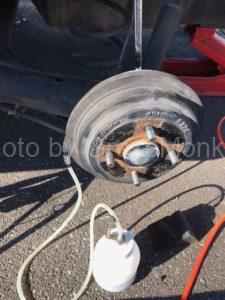
When all the brakes have finished replacing the brake fluid, make sure that each breeder is securely settled and check whether there is a response to the step on the brake pedal in the driver’s seat. Also, when depressing the pedal, let’s also check if it stops completely at a certain position and whether the position of the pedal will rise when you step on many times. If the position of the pedal is raised and it stops slightly slowly falling when hanging on the engine, confirm that the master back (vacuum booster) at the back of the brake master cylinder is working normally Become.
Although the maintenance of the brake and the maintenance of the engine to pass the vehicle inspection of the Honda fit this time is almost the end, there is one item “brake adjustment” after that. As this will be long, I will let you know later.