The only car in the domestic market Car equipped with rotary engine
Mazda · RX-7 is a sequential rotary turbo car with a 134 engine of 654 cc × 2 rotor. The data of this time is the type MT of the Heisei 5 years and is the one of the MT car (manual shift car).
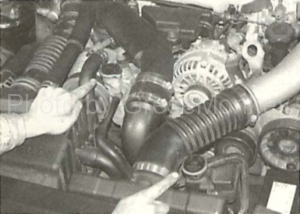
Because all grades are inter coolers and turbo, the engine room is tightly packed with mechanics and it is hard to say that maintenance is easy. In order to secure the space to use the tool to do each work, ingenuity such as detaching the peripheral equipment etc. is required.
Table of Contents
- Jack point
- Jack and rigid rack points
- Maintenance point in the engine room
- engine oil
- Mission · Differential oil
- Differential oil change
- Cooling water (LLC)
- Brake
- ABS check
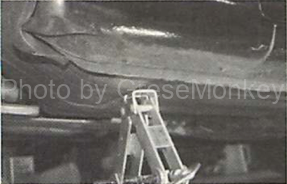
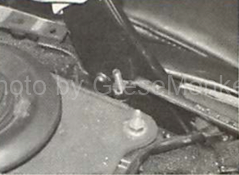
Jack point
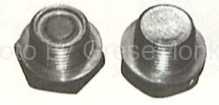
The front part is the middle part of the cross member (front side) where the three presses on the small oval with holes in the middle enter side by side. The rear is a steel differential case part, but please pay attention to the exhaust pipe immediately.
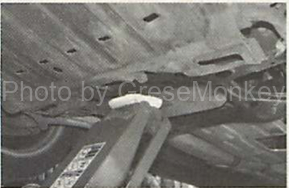
front
rear
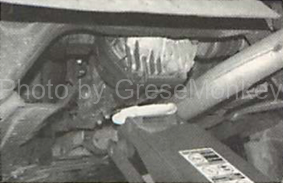
Jack and rigid rack points
As with general domestic cars, the side sill part is the point both front and rear, but the press mark which is the mark of the jack point is a little hard to understand. The vehicle jack is made of aluminum.
front

rear
Maintenance point in the engine room
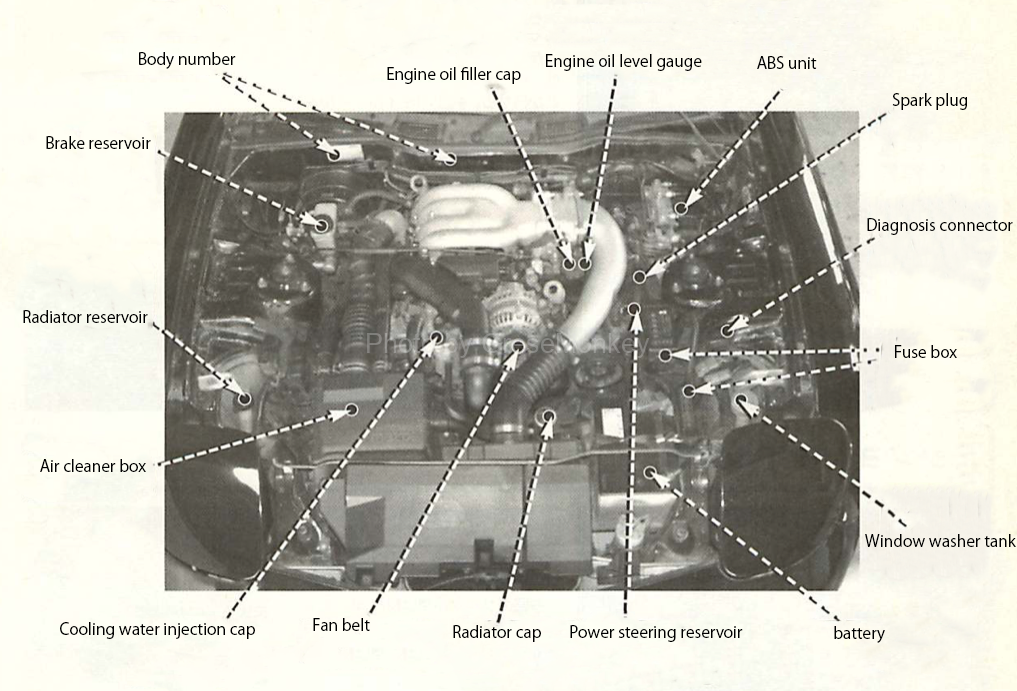
engine oil
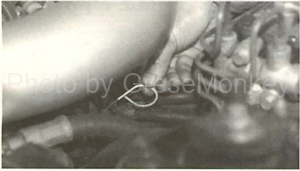
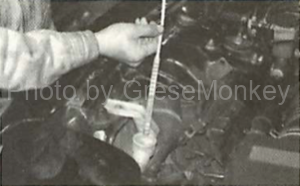
Inspection of engine oil quantity
The inspection method is exactly the same as the reciprocating engine, and check the oil level with the level gauge plugged in the oil pan.
The level gauge is a yellow knob in a part that is hard to see under the air fennel made of resin painted in silver. Check it by warming the engine and leaving it for 5 minutes, if it is between the level gauge F (FULL) and L (LOW).
There are descriptions of F and L in the level gauge, so long as the oil level is in the middle of it. By the way, the difference in oil amount between F and L is about 1.7 ℓ.
To remove the drain, use a 19 mm wrench. Engine oil is injected from the oil filler cap behind the alternator using the same 4 cycle for reciprocating.
The oil filter can also be removed with a general-purpose filter wrench. There are two types of genuine oil filters, 65 mm and 68 mm in outer diameter, but it is OK if both are tightened with the full force after installing to the contact surface.
- Oil capacity (reference value)
- At oil change: 3.6 l
- When replacing filter: 3.8 l
Mission · Differential oil
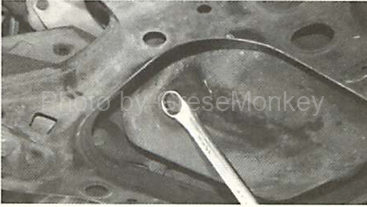
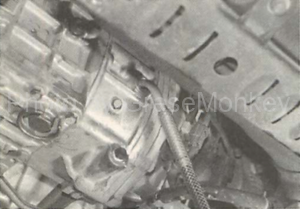
Mission oil discharge
In order to change the mission oil / defoil, it is necessary to level the car body, so you can work with all four wheels on the rigid rack. There are two places of drain with 24 mm bolt and four square head which it turns with a monkey wrench and let it drain from each.
Drain of the square head is tapered thread, so be careful as it will damage the case side when tightening beyond the limit.
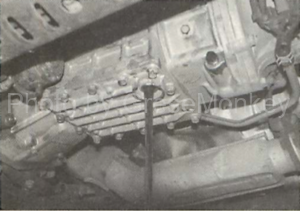
Because the drain of the square head is a tapered screw, when installing, attach a specified seal material or a seal tape for water supply to install.
Mission oil injection
Injection of oil is done by removing filler bolt of quadrilateral head above drain and inject mission oil from there. Do not mess with the neighboring torque sandy fiat bolt.
The injection amount is just before leakage is the specified amount. A pump etc is necessary for injection of oil, but there is also a way to do it patiently with a commercially available electric oil changer or a long hose。
Type and capacity of gear oil
- Viscosity: SAE 75 W-90
- Capacity: 2.5 ℓ
- As long as the viscosity is being protected, manufacturers will not ask
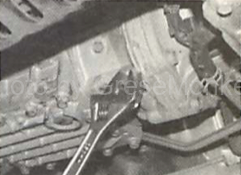
Differential oil change
Drain and filler bolts to be seen at a glance
As for the defrost oil, like the mission oil, change the car body in parallel and replace it. In the rear cover part of the differential case, there is a drain bolt and a filler plug (both are 24 mm) at a glance, and firstly oil is discharged from a chain. Next, install the drain plug and inject it until the spill of oil fills from the filler plug hole is OK.
- Type and capacity of differential oil (reference value)
- Viscosity: SAE 90 · GL-5
- Capacity: 1.3 ℓ
If viscosity is the same, the manufacturer will not ask.
The one with the magnet for collecting metallic debris is the drain plug. When installing please do not forget gasket washer.
Cooling water (LLC)
Check and change the cooling water volume
Check the amount of cooling water in the reservoir tank behind the right headlight. At the same time remove the radiator cap when cold, also check that there is cooling water to fill the mouth. This car has two radiator / cap-like items, but the round cap is the radiator cap, and the other is the simple inlet. We will check both quantities one by one.
Replacement of the cooling water only needs to be exchanged every two years as much as it has escaped from the drain of the radiator. Although the drain is loosened with the + screw, it is easier to work if you remove the undercover under the car body. Cooling water is injected from the inlet. Warm up for about 10 minutes when checking in the mouth and check the amount, repeat until the air does not come out. Rinse the reservoir tank well.
- Cooling water capacity (reference value)Total capacity: 8.8 l
- Reservoir tank capacity
- F revel・0.8ℓ
- L revel・0.3ℓ
- Reservoir tank capacity
It is necessary for the level gauge attached to the lid of the reservoir tank to be located between F and L. The check of the amount of reservoir tank may be warm feeling. In warm weather, the amount increases due to thermal expansion of water
Brake
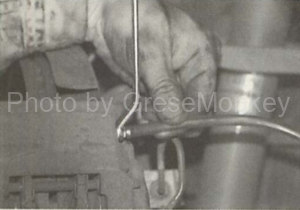
Brake / Fluid Exchange
Although ABS is standard equipment for all grades, it is good to exchange fluids in a general way. Loosen the bleeder plug of the caliper, attach the transparent tube, and work while keeping the reservoir tank liquid on the right side of the engine room above the LOW level.
If the fluid of the reservoir decreases beyond the limit during work, air will be mixed in, so please be careful.
Brake pad exchange
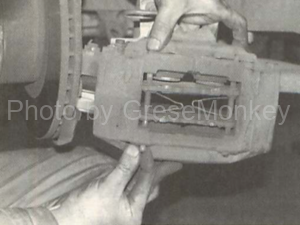
The opposite 4 piston caliper made of a certain stomach alloy is adopted at the front. You can remove the pad even when it is worn without removing the caliper as shown in the picture. If you remove the clip on the side of the caliper and extrude the pin, you can easily remove the pad.
Make a note of how to attach clips and pins at this time, you will not get lost later.
Insert a thick flathead screwdriver etc. into the part where the piston was in, push back so that the disc and piston will not be damaged.
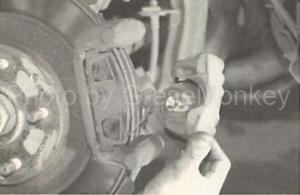
Rear disc: 1 piston · floating caliper
The rear is a floating caliper with 1 piston. Remove the bolt on the slide part and remove the caliper, you can remove the pad.
Since the side brake mechanism is built in the piston, it can be retracted by turning the piston itself clockwise instead of pushing back. However, please be sure to unlock the side brake at this time.
- Specified brake · fluid
- The standard may be DOT 3, but because it is a sports car, DOT 4 with higher boiling point is OK.
- It is not necessary to stick to genuine products necessarily.
Even if you do not use SST to return the piston, you can turn it with a radio pliers or the like, but be careful with injury.
Bolt is fixed up and down. Align the caliper part with the alphabet in the moat and head. By the way G is on the upper side.
For the side brake, it is OK if there are 7 to 10 notches to pull. Adjust the console and adjust with 10 mm nut next to the lever.
- Disk / rotor usage limit (front)
| Thickness | Standard value: 22.0mm | Limit value: 20.0 mm |
|---|---|---|
| Swing width | Within 0.1 mm (measured at the outer circumference) | |
- Disk rotor usage limit (rear)
| Thickness | Standard value: 20.0mm | Limit value: 18.0mm |
|---|---|---|
| Swing width | Within 0.1 mm (measured at the outer circumference) | |
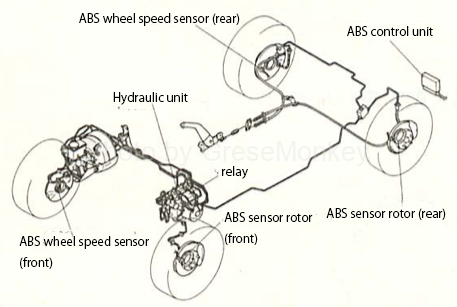
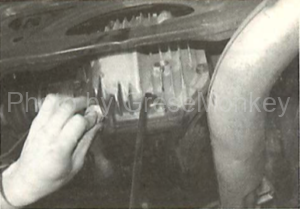
ABS check
Dedicated adapter is required for ABS diagnosis
If there is an abnormality in the electrical system of the ABS, the warning lamp inside the meter lights up. ABS has a diagnosis function using this warning lamp, but it can not be utilized without a dedicated adapter. As a result, the general tester can only do the wheel speed sensor (remove the connection connector and measure the resistance value of 4 places) and ABS unit relay check .
- Wheel speed sensor resistance value
- Typical value: 0.8 to 1.2 kΩ
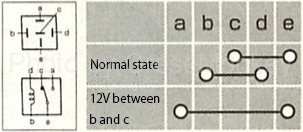
- Relay check in ABS unit
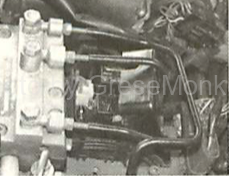
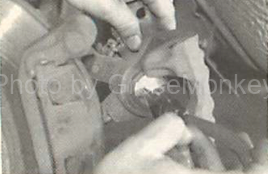
Relays are on the top two of the ABS units. Remove the cover, pull out the relay, and inspect continuity of the part of the flower vase.

ABS control, 4 sensor 3 channel system
The rotation speed of the tire is detected by a total of four sensors of each wheel, and in the actual control, the front is performed independently on the left and right, and the rear is controlled in the same way on the left and right. The integrated control of this rear is a select low control method that compares the left and right wheels and controls the pressure of the brake fluid at the right and left wheels according to the person who is likely to lock