The only car in the domestic market Car equipped with rotary engine
Mazda · RX-7 is a sequential rotary turbo car with a 134 engine of 654 cc × 2 rotor. The data of this time is the type MT of the Heisei 5 years and is the one of the MT car (manual shift car).

Because all grades are inter coolers and turbo, the engine room is tightly packed with mechanics and it is hard to say that maintenance is easy. In order to secure the space to use the tool to do each work, ingenuity such as detaching the peripheral equipment etc. is required.
Table of Contents
- Jack point
- Jack and rigid rack points
- Maintenance point in the engine room
- Power steering · Air cleaner
- Fan belt
- Electrical system
- battery
- suspension
- Wheels and tires
Jack point
When using a garage jack
The front part is the middle part of the cross member (front side) where the three presses on the small oval with holes in the middle enter side by side. The rear is a steel differential case part, but please pay attention to the exhaust pipe immediately.
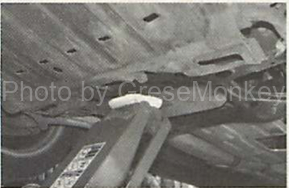
front
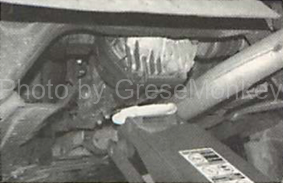
rear
Jack and rigid rack points
As with general domestic cars, the side sill part is the point both front and rear, but the press mark which is the mark of the jack point is a little hard to understand. The vehicle jack is made of aluminum.
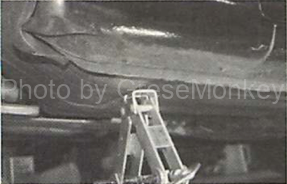
front

rear
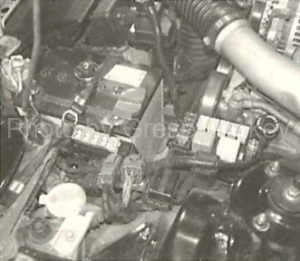
Maintenance point in the engine room
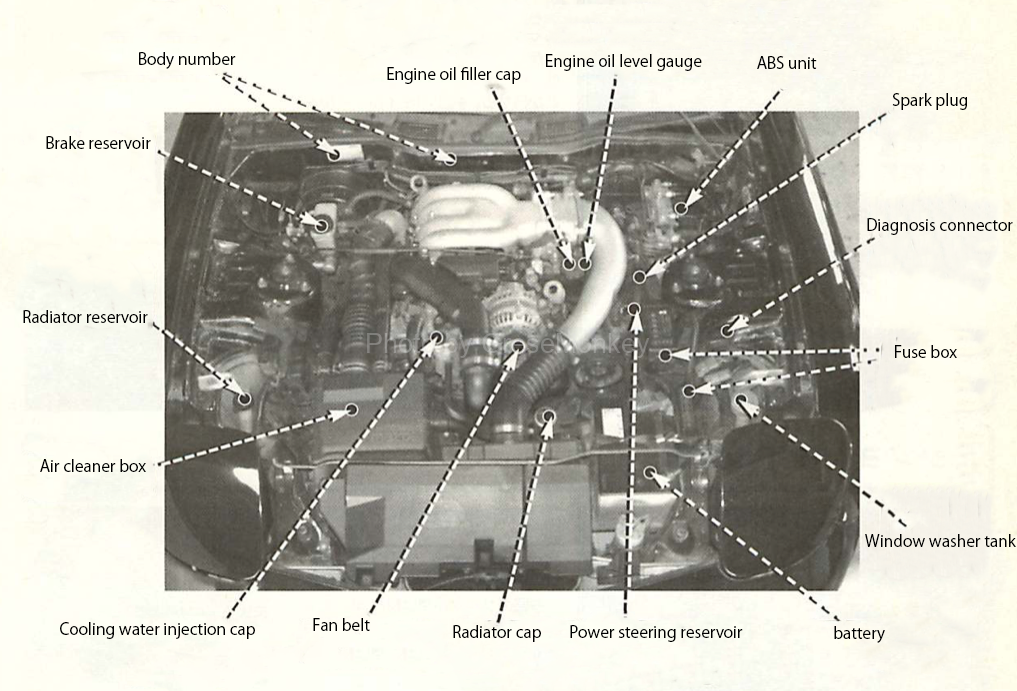
Power steering · Air cleaner
Power steering · fluid inspection
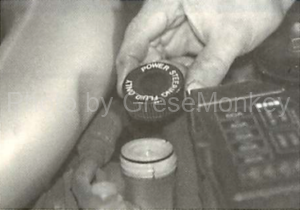
The reservoir tank of the power steering is directly above the power steering pump (side by side of the alternator), and the check of the fluid amount should be within the Hi-LOW level at the side of the tank at the cold time before the start. Although exchange is not specified, it is better to replace the fluid solution if it is dirty and dirty.
Exchange is done by a method such as pulling out from the injection port. By the way, the total capacity of oil is 0.96 ℓ.
Please use ATF as much as possible genuine.
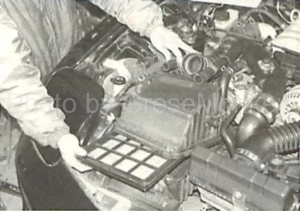
Air cleaner / element exchange
Designated replacement time of air cleaner is every 50,000 km. It is a little troublesome to replace, since you have to remove the air duct and piping.
As wet type elements are adopted, cleaning with air blowing should not be done.
Fan belt
Inspection of deflection of belt
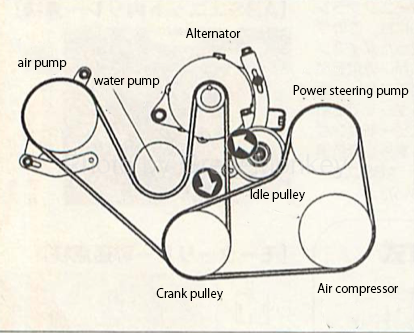
2 belts to use
Fan belt is used with two V-ribbed belts. To check the tension state, look at the amount of deflection when pushing the arrow part of the figure with 10 kg. In case of a new belt, it is good to calculate the initial elongation and strengthen it. Please refer to the values in the table for the amount of deflection.
There is no designation of the replacement time in the belt, but if cracks etc are contained in the belt surface or back rib (rib mountain), it is better to change.
| When installing a new product (mm) | When re-tensioning (mm) | Re-tension limit (mm) | |
|---|---|---|---|
| For alternator air pump | 6~7 | 7~7.5 | 9 |
| For P/S, A/C | 3.5~4 | 4.5~5 | 6 |

Alternator air pump belt Adjustment is performed by the alternator section. First loosen the fixing bolt of A and B nut, then turn C mother bolt and adjust until it becomes the specified tensioning condition, then tighten A · B and complete.
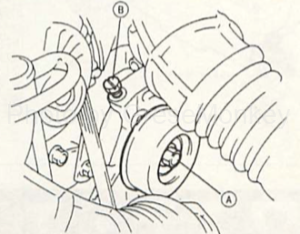
Adjust with an idle pulley. Loosen the nut A in the center of the pulley and tighten the A to the specified tension with the adjustment bolt of B. Complete it.
Electrical system
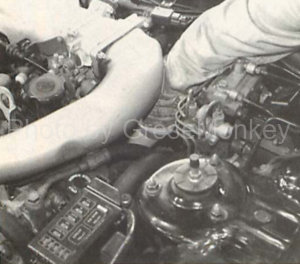
Removal of spark plug
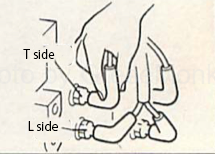
Use two types of rotary plugs
The spark plug uses two plugs of T (trading) and L (leading) on one rotor. Removal is done by putting hands in the gap of the level gauge of the engine oil, but when it is absolutely necessary it will work by removing the funnel (silver color) of the photograph.
Since the position of the plug cap is close at the time of removal, care must be taken so as not to make a mistake.
Also, normally it removes using a car wrench plug wrench, but in case there is no 21 mm plug wrench (long socket) it is OK.
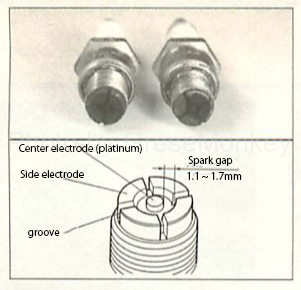
Inspection / cleaning of spark plug
No gap adjustment is done
The plug is a rotary type only type in which the outer electrode does not protrude. Cleaning is done by spraying a cab cleaner or the like.
Check the gap at the gap between the center electrode and the outer electrode. The specified value is 1.1 to 1.7 mm and the usage limit is 1.8 mm.
In the standard type that is installed in the state of a new car, since platinum is used for the center electrode, gap adjustment should not be performed.
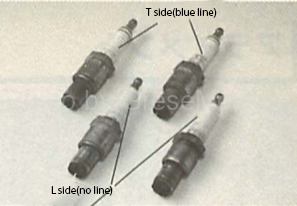
| T side(Trailing) | Standard BUR9EQP (platinum plug) | BUR9EQ, BUR8EQP, BUR8EQ |
|---|---|---|
| L side(Reading) | Standard BUR9EQP (platinum plug) | BUR6EQ, BUR5EQP, BUR5EQ |
battery
Basic is liquid surface management
The standard specification is 55 D 23 L, the specifications of the cold area of MT is 65 D 23 L, and the specification of the cold area of AT is equipped with 75 D 26 L. Replenish the electrolyte solution, remove it from the car body, tilt to the extent that the liquid will not spill, put out the internal bubbles, then put the replenisher up to the upper level.
As a criterion of the state of the battery, it is good if it is 12.4 V or higher and the specific gravity is 1.27 to 1.29 (outside temperature 20 degrees).
- Voltage / specific gravity standard value
| Voltage | over 12.4V |
|---|---|
| Hydrometer | 1.27~1.29(20℃) |
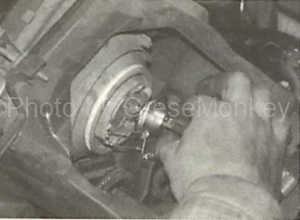
Replace valve
Replacing the headlight bulb is somewhat troublesome
Because it is a retractable headlamp, bulb replacement is a little troublesome. Loosen the screw that holds the lid (exterior part) while defeating the light.
Next, raise the light, remove the bezel (the rim around the lens), loosen the screw of the lid, the lid will come off and the valve can be replaced. After exchanging, it is necessary to adjust the lid upright.
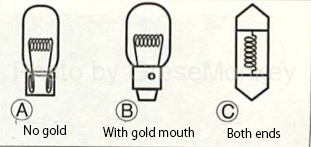
| Where to use | W (unit) | Type |
|---|---|---|
| Head Light | 55/60W | H4type harogen |
| Position Light | 5W | Ⓐ |
| Front Turn Light | 21W | Ⓑ |
| Front Side Turn Light | 5W | Ⓐ |
| Stop/Tail Light | 21/5W | Ⓑ |
| Rear Turn Light | 21W | Ⓑ |
| Back Light | 21W | Ⓑ |
| Lisence Light | 5W | Ⓐ |
| High Mount Stop Light | 18W | Ⓐ |
| Room Lamp | 5W | Ⓐ |
| Cargo Room Lamp | 8W | Ⓒ |
| Grove Box Lamp | 3.4W | Ⓐ |
suspension
alignment
Accurate adjustment is an alignment tester
Suspension is a 4 wheel double wishbone, alignment can be toe, caster (front only) camber adjustment can be done.
Castors and camber are made with a cam which is on the base of the lower arm. Alignment adjustment basically can not be accurate measurement or adjustment unless it is a shop with an alignment tester, etc. For reference, the reference values of front and rear are shown below.

- Front alignment
| Item | Specification | |
|---|---|---|
| Tooin | Total/Tooin | 1±3mm |
| Side/Tooin | 0°03′±08′ | |
| Turning angle | inside | 36°±2° |
| outside | 32°±2° | |
| King Pin Angle | 13°55′ | |
| Camber Angle | 0°05′±45′ | |
| Caster Angle | 6°05′±1° | |
- Rear Alignment
| Item | Specification | |
|---|---|---|
| Tooin | Total Tooin | 2±3mm |
| Side Tooin | 0°05′±08′ | |
| Camber Angle | -1°15′±45′ | |
| Thrust Angle | 0°±06′ | |
Wheels and tires
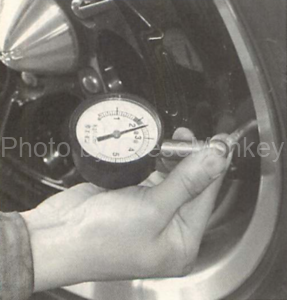
Point of pneumatic pressure control
Check the scratches on the rim part and the width and width of the wheel in the vertical and horizontal directions. Tire inspection, check air pressure and groove depth, cracks and so on. In general, the depth of the groove of the tire is exchange at the remaining 1.6 mm.
It is the tire pressure of emergency etc that tend to forget. It is high pressure 4.2 kg / cm 2, so it is better to check it occasionally. For reference, I will show the wheel / tire size of the sample car in the table.
| Item\Type | S,X | R | |
|---|---|---|---|
| Standeard Tire | |||
| Tire | Size | 225/50R16 92V | 225/50 ZR 16 |
| air pressure | 2.2kg/cm2 | ||
| Wheel | Size | 16×8jj | |
| Runout limit | Sideways 2.2mm | Vertical runout 1.5mm | |
| Offset | 50mm | ||
| Pitch circle diameter | 114.3mm | ||
| Emergency tires | |||
| Tire | Size | T135/70D16 | |
| Size | 4.2kg/cm2 | ||